The White Label feature lets you remove the license key information in the plugin settings and remove all WebFactory branding and logos.
If you would like to rebrand the entire plugin, please see how rebranding works.
Before you can turn on white labeling on a specific site, you have to make sure that the license you’re using on that specific site has the feature turned on.
How to Turn on the White Label feature?
- Go to dashboard.wpforcessl.com and log in,
- Open the “Licenses” page,
- Add New License or Edit an existing one (you can turn on white-labeling on both license types),
- On the right-hand side of the screen, locate the Extra Features,
- Find “White Label” and click on the checkbox,
- Save Changes by clicking the button on the bottom of the page.

Enable White-Label License Mode
Once you’re sure that the license key has the white-label feature turned on, you can proceed to enable it on your site.
Important Note: If you have updated an existing license that was already used to activate the plugin, you will have to go to the License page in the plugin and click the “Save & Reactivate License” key.
- Go to Settings -> WP Force SSL -> License,
- On the bottom of the page, find the “Enable White-Label License Mode” button,
- Click on the button to activate the White-Label feature.
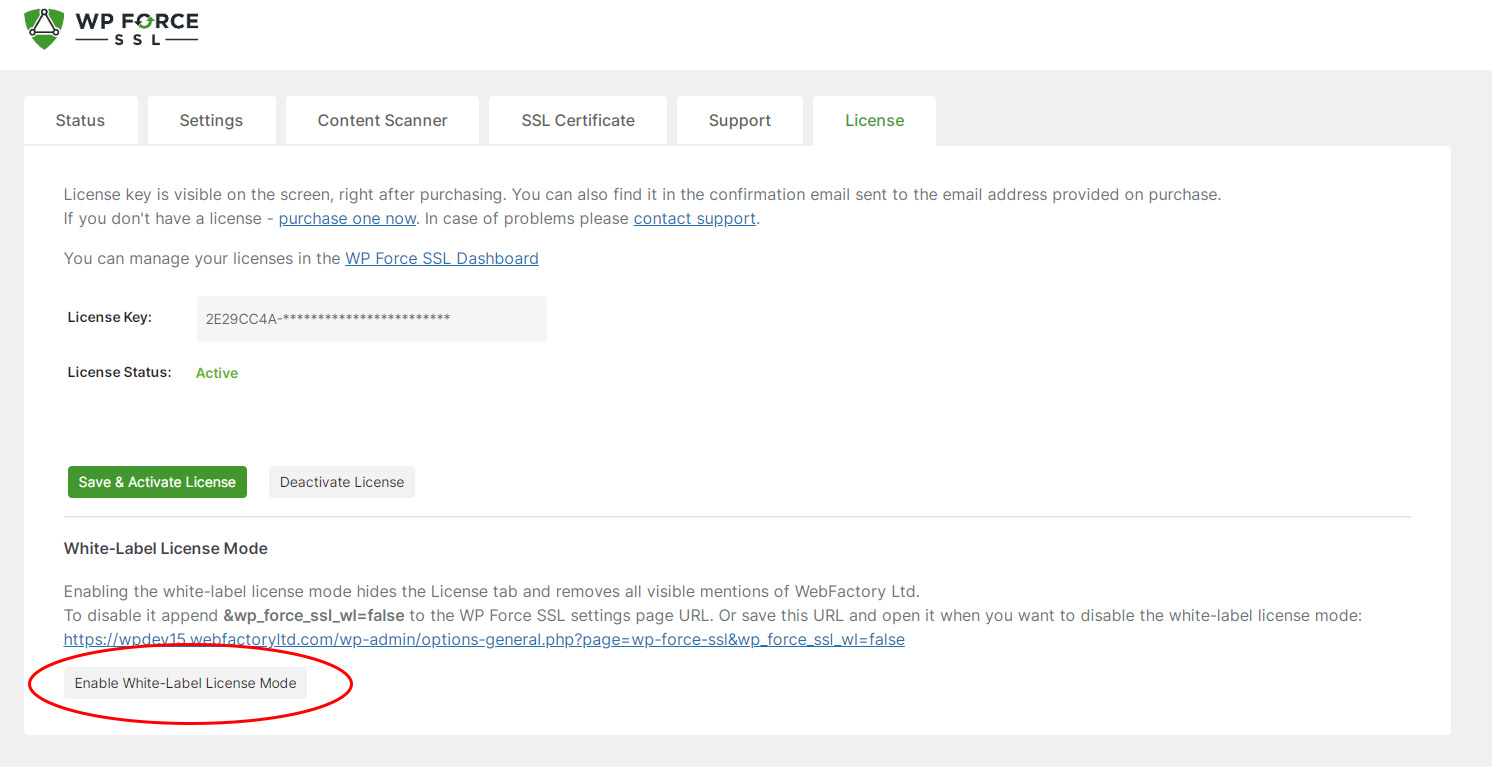
Enabling the white-label license mode hides License and Support tabs, and removes visible mentions of WebFactory Ltd. To disable it append &wp_force_ssl_wl=false to the WP Force SSL settings page URL.
Your link should look like this: https://yoursite.com/wp-admin/options-general.php?page=wp-force-ssl&wp_force_ssl_wl=false