Unlike White Labeling, Branding allows you to completely change the name of the plugin, logo, and appearance.
That way, you can present WP Force SSL as a completely new plugin with your brand colors all over it.
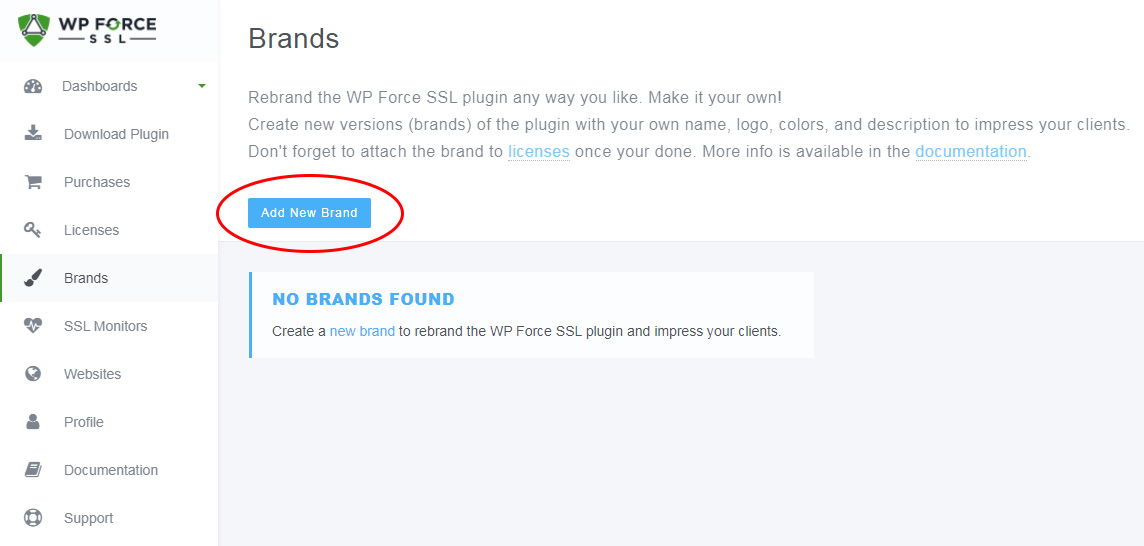
How to Rebrand the Plugin?
- Open https://dashboard.wpforcessl.com/ and log in,
- Go to the “Brands” page,
- Click “Add New”.
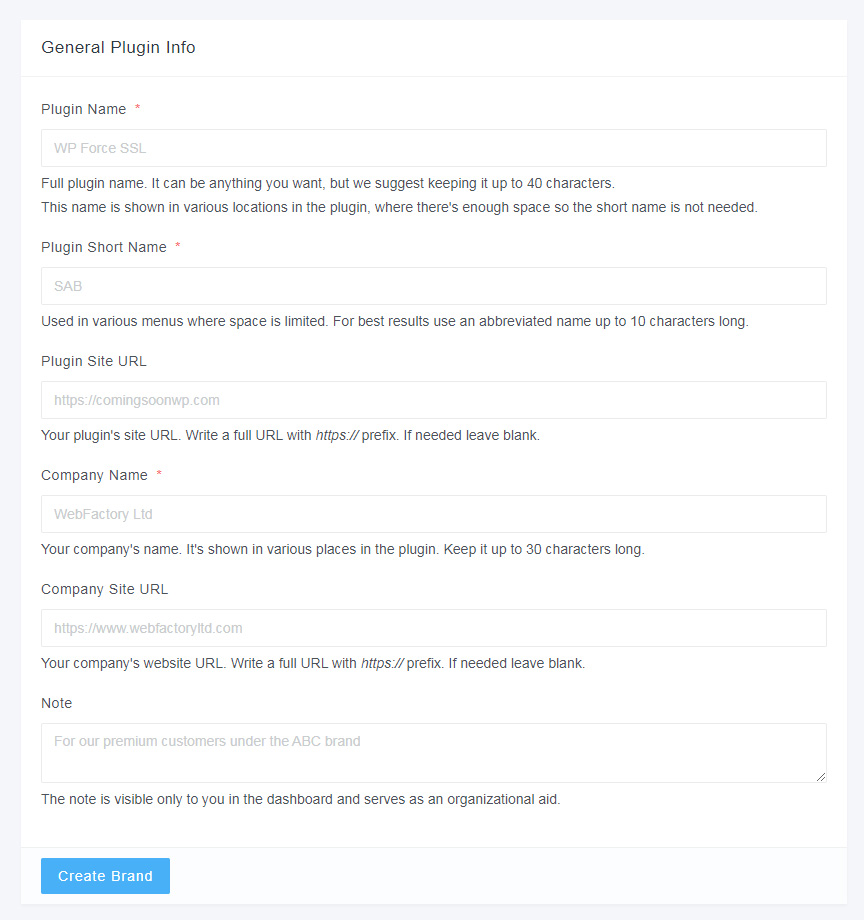
General Plugin Info
A new page will open up that holds all the important information about rebranding. Here you can edit the details about your brand before applying it to a specific license.
- Plugin Name – Choose the name of the plugin. It can be anything you want, but we suggest keeping it up to 40 characters, and it must be longer than 3 characters. This name is shown in various locations in the plugin, where there’s enough space so the short name is not needed.
- Plugin Short Name – Used in various menus where space is limited. For best results use an abbreviated name up to 10 characters long.
- Plugin Site URL – If you want to link the rebranded plugin to your agency site, you can leave the link here.
- Company Name – Your company’s name. It’s shown in various places in the plugin. Keep it up to 30 characters long.
- Company Site URL – Your company’s website URL. Write a full URL with https:// prefix. If needed, leave blank.
- Note – The note is visible only to you in the dashboard and serves as an organizational aid.
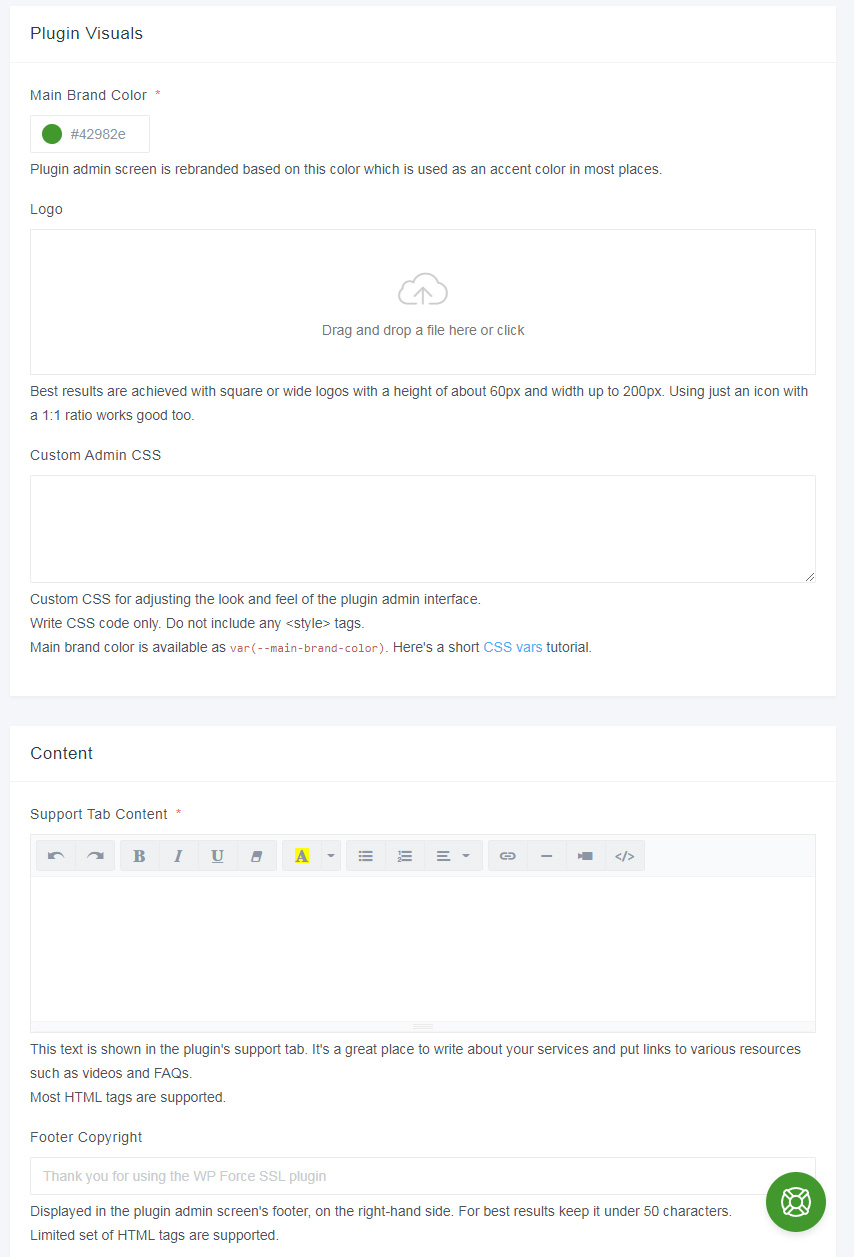
Plugin Visual
Just changing the general info will probably be enough. But if you want a complete rebrand, you will also want to change the plugin visuals. Here you can add your own logo, change colors, add your own content, and even write custom CSS to completely change the look of the plugin.
- Main Brand Color – The plugin admin screen is rebranded based on this color which is used as an accent color in most places. Click to choose the color or write the hexadecimal value.
- Logo – drag and drop the file into the box. Best results are achieved with square or wide logos with a height of about 50px. Using just an icon with a 1:1 ratio works well too. When uploading a logo for a brand please mind these min/max image size values:Height between 32px and 100px
Width between 32px and 500px
Max file size 500Kb - Custom Admin CSS – Custom CSS for adjusting the look and feel of the plugin admin interface. Write CSS code only. Do not include any <style> tags.By default, when rebranding, the following CSS is added (which you can overwrite):
.csmm-main-menu li.active > a { border-left: 2px solid #main-brand-color; }<br>.home-box span { border-left: 2px solid #main-brand-color; }<br>.csmm-header { border-top: 3px solid #main-brand-color; }<br>.csmm-tile .csmm-tile-title, .csmm-tile-title + p { border-left: 2px solid #main-brand-color; }<br>.csmm-body { padding: 10px 20px 30px 20px; } - Content – This text is shown in the plugin’s support tab. It’s a great place to write about your services and put links to various resources such as videos and FAQs. Most HTML tags are supported.
- Footer Copyright – Displayed in the plugin admin screen’s footer, on the right-hand side. For best results keep it under 50 characters. A limited set of HTML tags are supported.
Assign the Brand to a license
If you have followed the steps above to create your new brand, everything should be ready. But before you can actually rebrand the plugin, you will need to attach this brand to a license.
- Create a new license or edit an existing one,
- On the right-hand side of the screen, find the “Custom Branding” feature,
- Select the brand you have just created,
- Save changes.
Please note that if you’re making changes to an existing brand, you will have to re-sync the license. You can do that from the plugin (license tab) or remotely via the dashboard.